Synchronicity and a Setting Idea for this month’s block
This morning, Christa emailed me with a photo of her calendar. The quilt in the photo is Road Trip by Pat Wys (from her book Knockout Neutrals).

If you like on-point settings, this will give you an idea of how our blocks might look, on-point, with narrow (1 1/2-inch) sashing and cornerstones. In these blocks, both the X and the Plus are scrappy, with a consistent dark square used for the center of the plus.
The calendar was created by That Patchwork Place. Thanks, Christa, for sharing this little bit of synchronicity with us.
Help for Color bleeding Problems
I was reading in past posts about color bleeding issues so I thought I would share some info for anyone wanting to wash colors that you may think will bleed. Shout color catcher sheets made by Johnson. Work great. I have washed colors that should not be washed with other colors as a test run, and the colors have never transferred, when I use one of these in the laundry. They are also great to have for teens and young adults doing laundry, who I find do not always care how they sort. Sorry if this is repeat information that someone else may have posted. I did not see anything about it an any of the posts I have read so far.
Week 5 – Row Sampler (non) Progress
Uh oh … I am already falling behind with my row per week goal.
I’d like to blame it on the “a word” (appliqué) … but it’s probably more a reflection of the stress in my life right now.
I cannot show you a row yet, but here’s my plan.
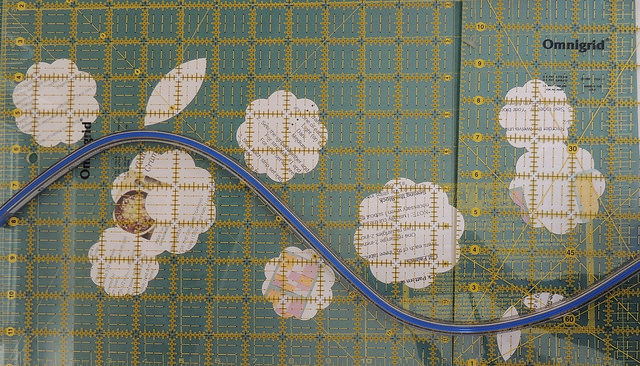
 I decided to work on the flower appliqué row next. Because I know the blocks will be side-by-side, I thought it would be fun to add a vine and a few leaves to connect the flowers. To figure out the vine, I used a bendy ruler that holds its shape.
Then I remembered a die that had a similar, smaller flower shape and decided to use it to cut the fusible flowers. To figure out how many I needed and where to place them, I cut a bunch of the shapes from scrap paper. the die also had some leaf shapes in two sizes, so I cut some of those, too.
Then, one night, I played with my pieces, using a 12 by 18-inch mat to get a rough idea of two 9 by 9-inch blocks. To make things easy, I decided to create a design that repeat every two blocks. At the end of the night, I was satisfied … and laid the rulers on top to prevent the cats from re-arranging things while I slept.
The next day, I committed my pattern to paper.

I have pieced the background using the printed in blue pork tamale bags and chosen fabrics, but that’s as far as I am with this row.
I did say in the beginning that these posts would help me be accountable … I hope to play catch-up soon.
Thought for the week
Life happens … and sometimes slows us down. If you don’t meet a published goal because of it, accept it and move on. (Or, at least, that’s what I am going to try to do.)
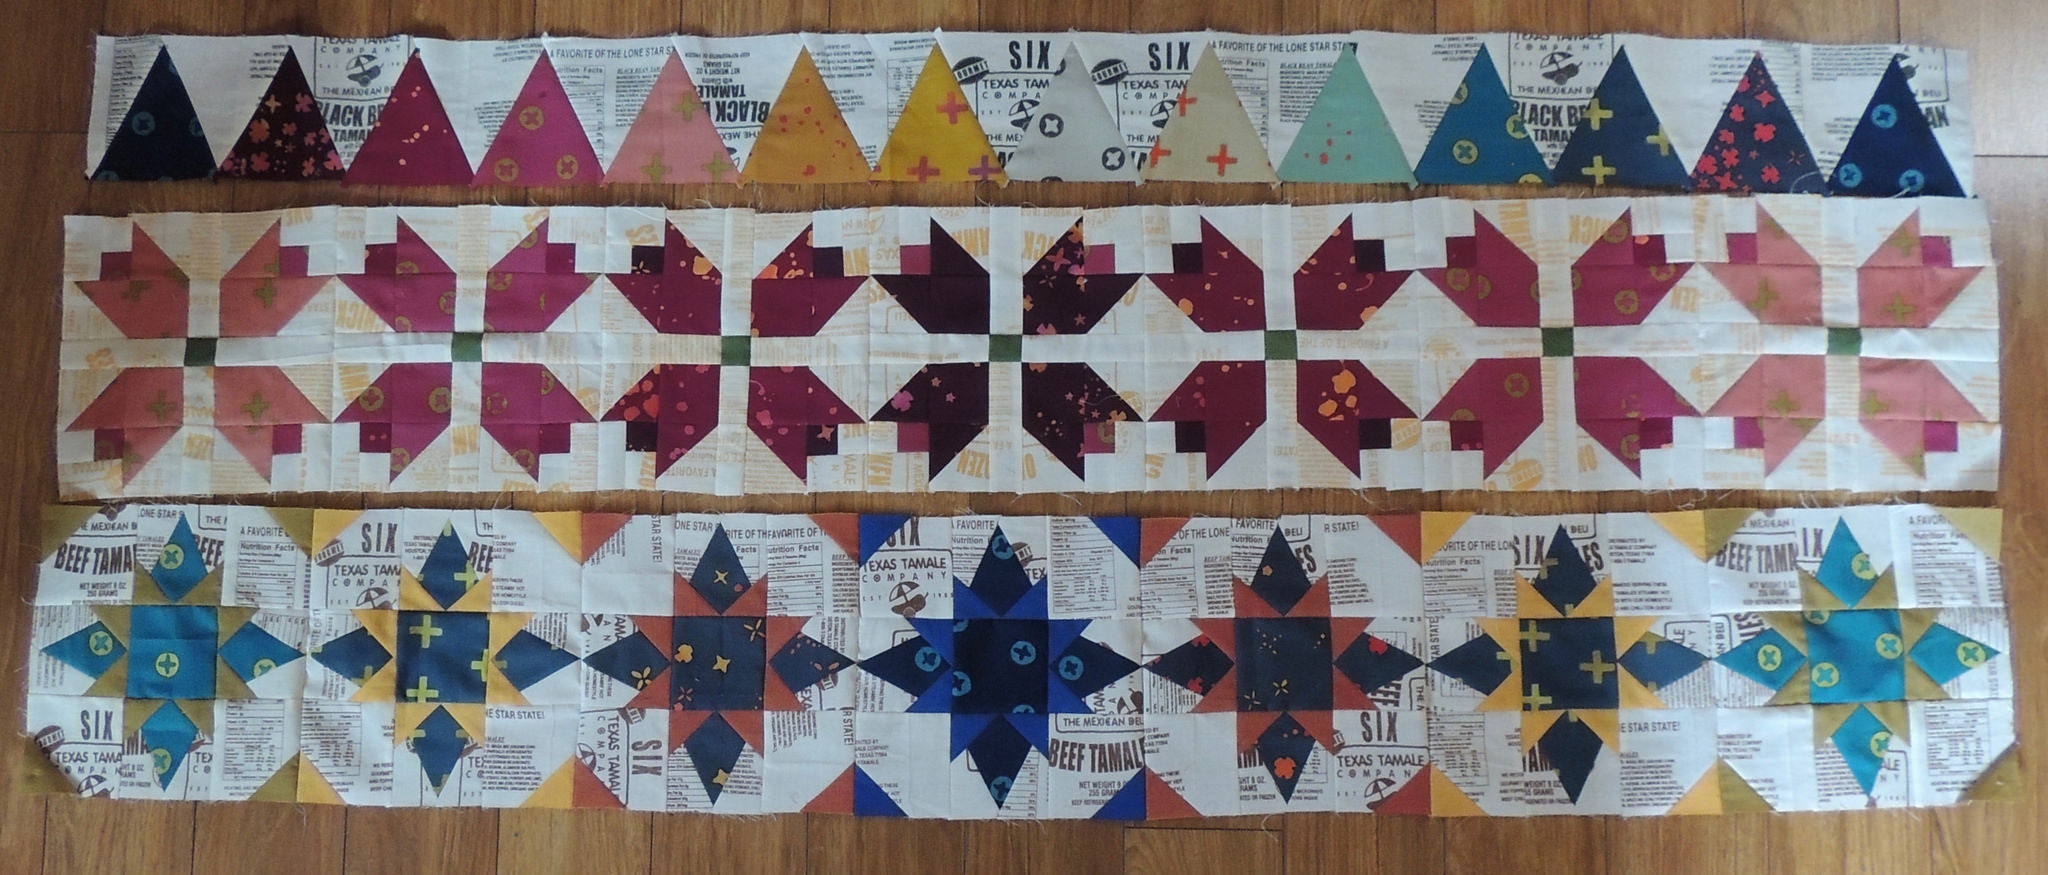
Week 4 – Row 4 of Sophie’s Sampler
Here is my sampler row quilt so far – 4 rows completed:
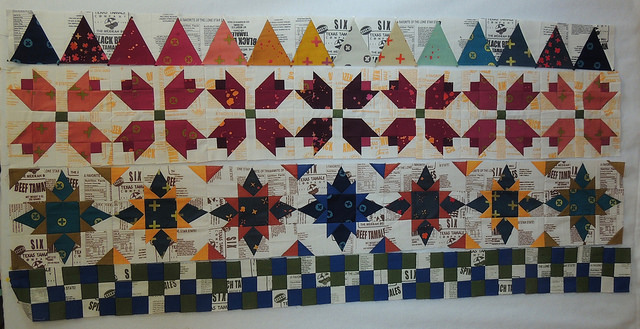
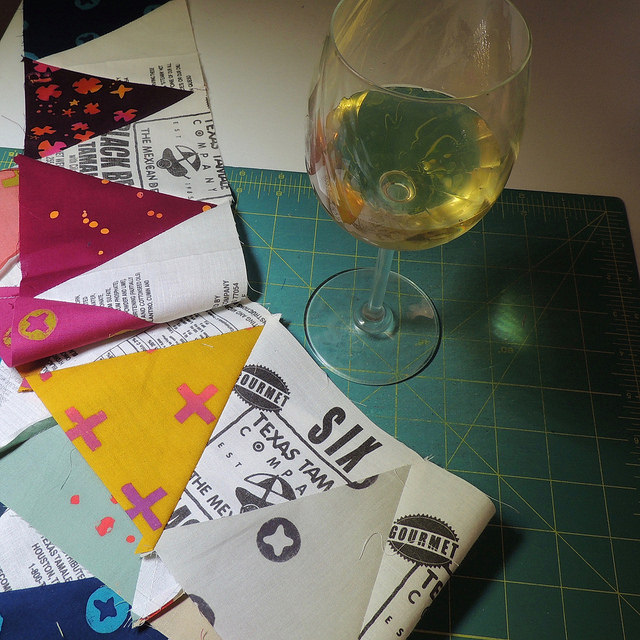
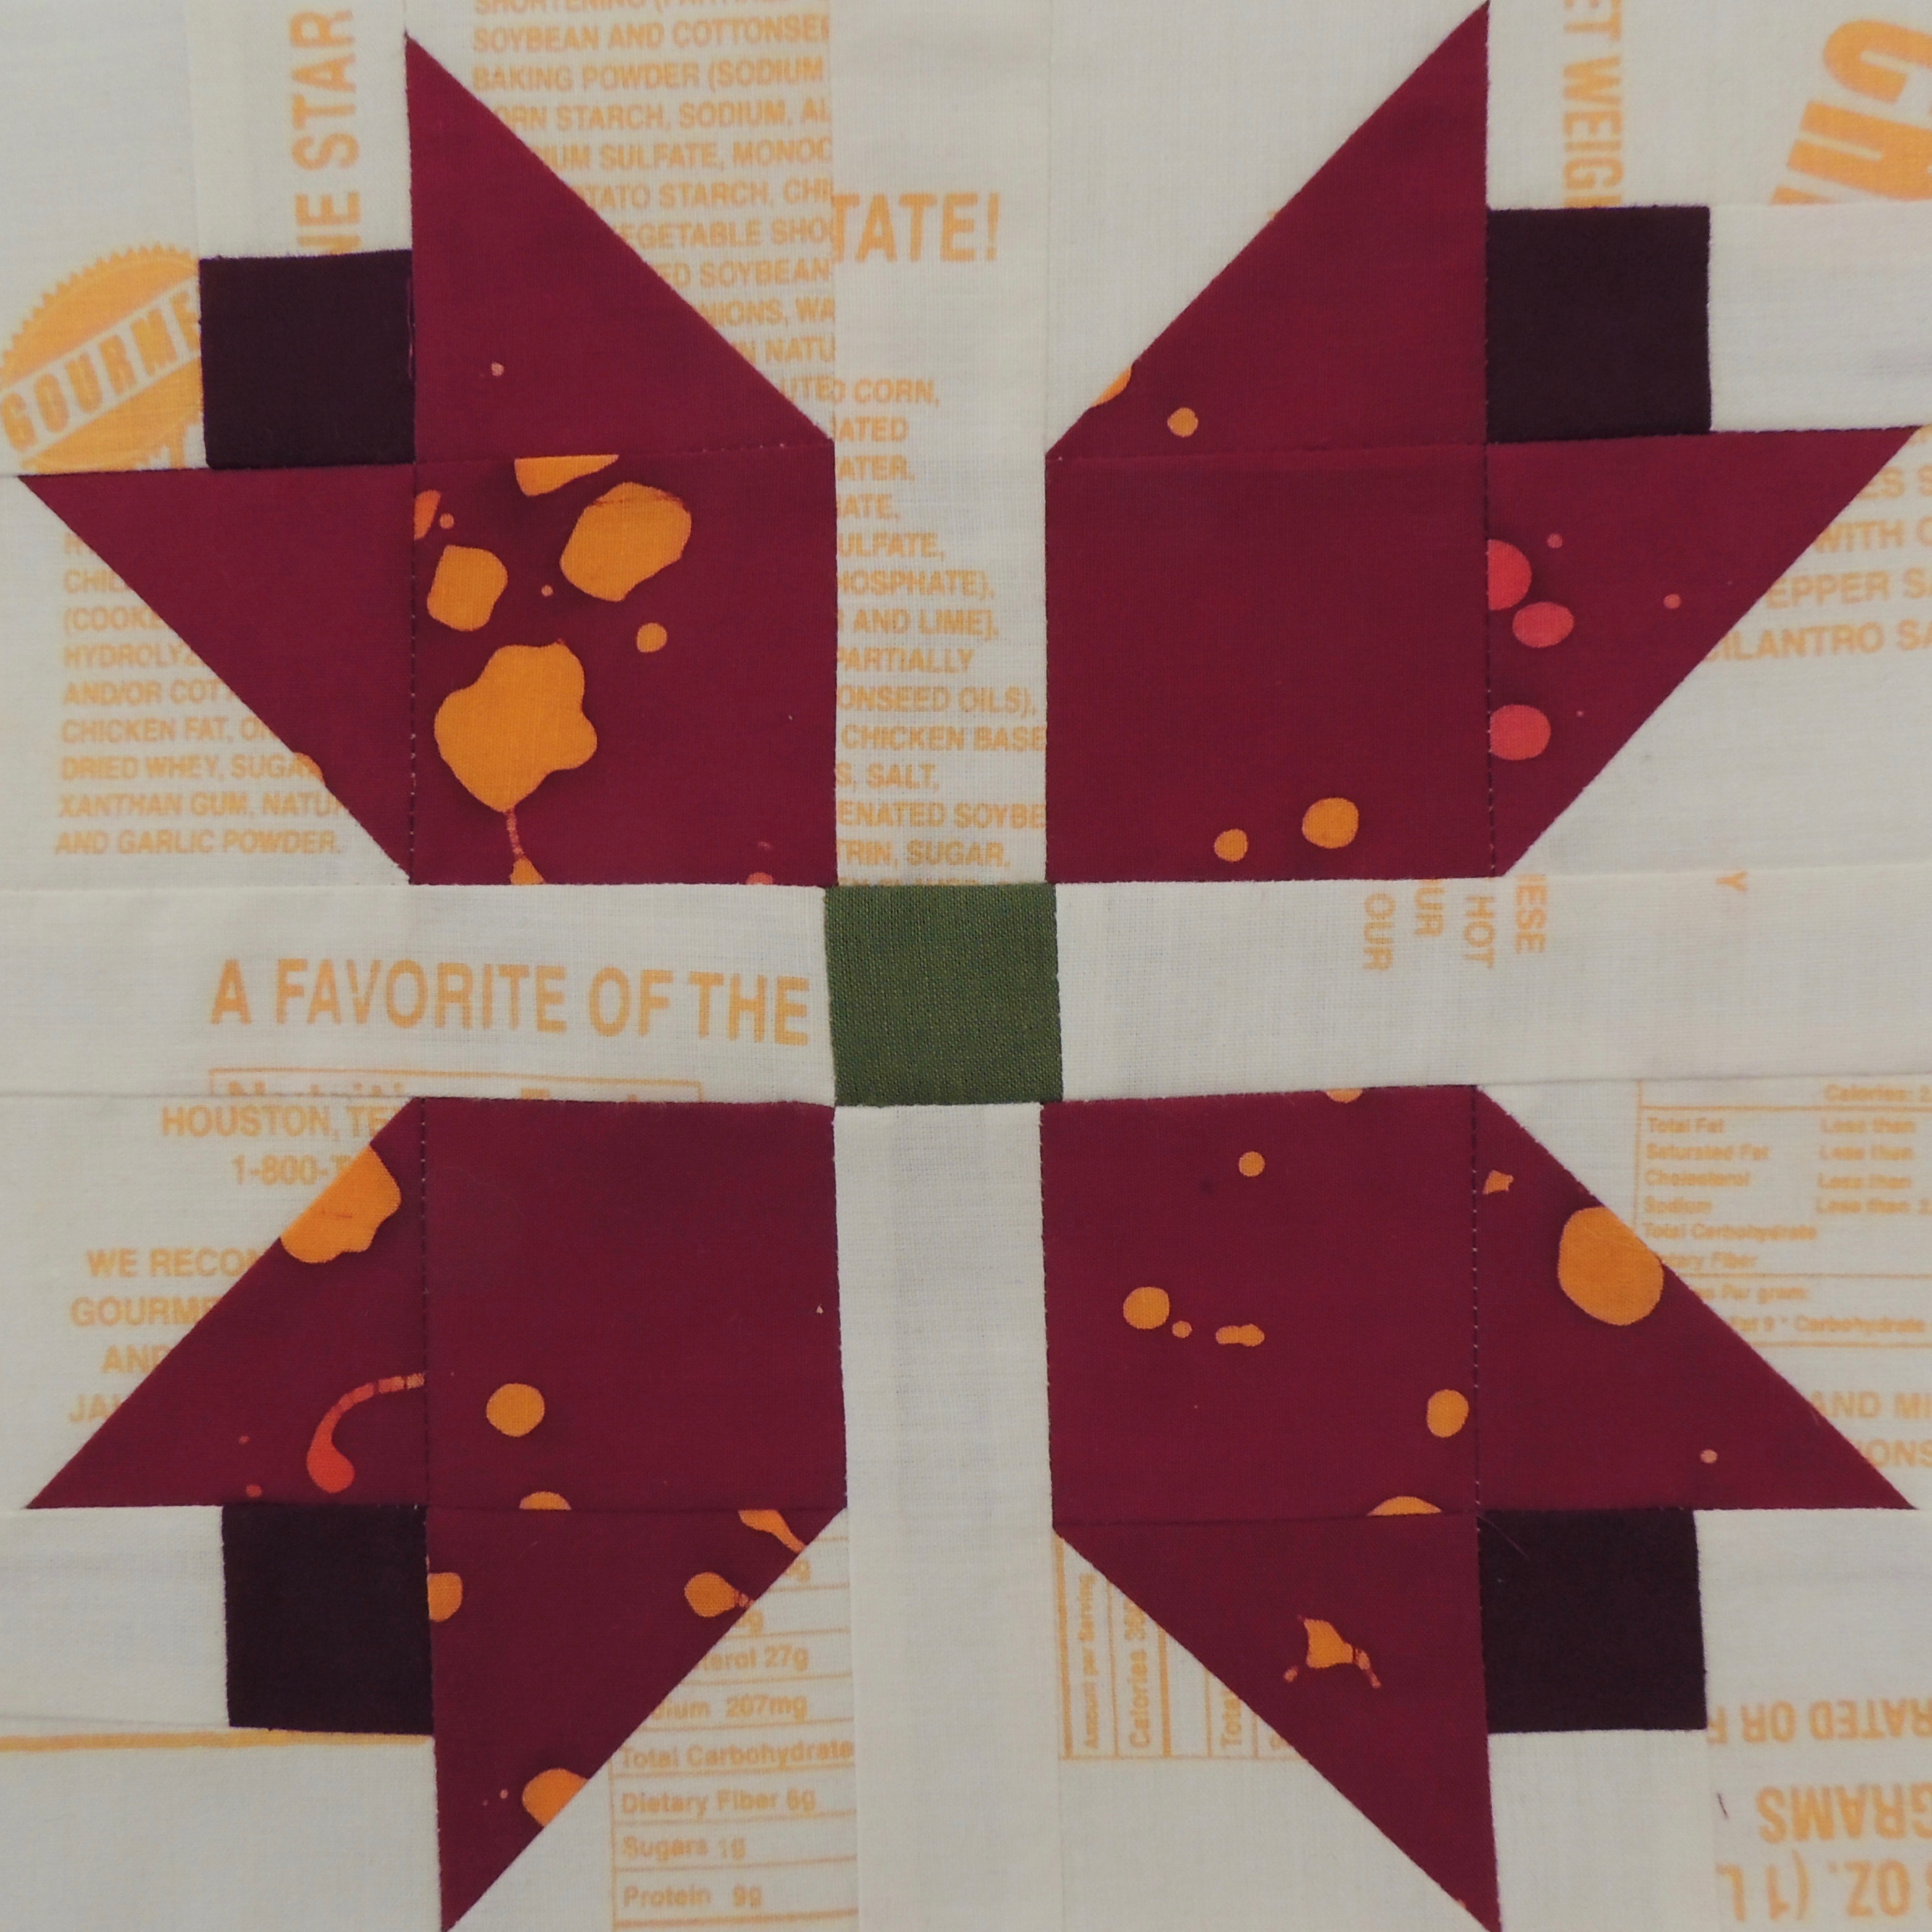
I decided to use two of the shot cottons for the Bargello 9-Patch row to see if it could calm things down a bit. The tamale sacks used for this row are green print (spinach).
This block was made using strip sets. Since I used the same fabric for all the blocks in this row, I constructed it by starting with longer strips. This was another case of making a half-block to fill the row.
Thought for the week
Working on a quilt that uses blocks patterns or fabrics you’ve used before can remind you of related quilts … like the lovely stack of Bargello 9-Patch blocks I won this year. I pulled them out of my bin of WIPS and UFOS and brought them into the studio so I can work on my quilt ideas … when other deadlines are met.
An interesting idea for those tiny bonus triangles
Look in the center of the blocks in this quilt, by Amanda Jean of Crazy Mom Quilts, and you’ll see small half-square triangles.
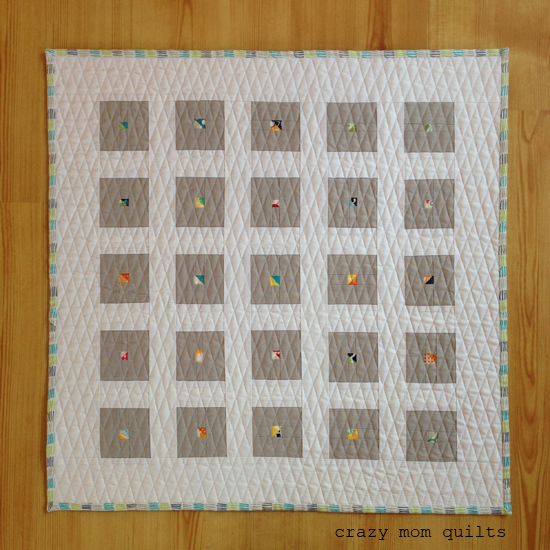
It’s a great example of how some tiny bits of interesting fabrics, with the addition of two neutral solids, can become a cool modern quilt. When I saw this on her blog, it ALMOST made me want to take apart my little linen piece and add some sashing … it could still happen.
Setting for the tulip blocks
I got a catalog from Connecting Threads today. This pattern would be a great way to set last month’s tulip blocks. Nordic Island Quilt Kit

(Image from Connecting Threads site)
Week 3 – Twinkle
 So far, so good. I’m still on track for my plan of
| 12 rows | |
| + | |
| 12 weeks | |
| ________ | |
| 1 Sampler Quilt |
This is my week 3/Row 3 check-in.
I decided to make the row that’s under the Tulips in my sketch, which also happens to be this month’s Twinkle block.
I need 7 of the 9-inch blocks for my 63-inch row.
Choosing Fabrics
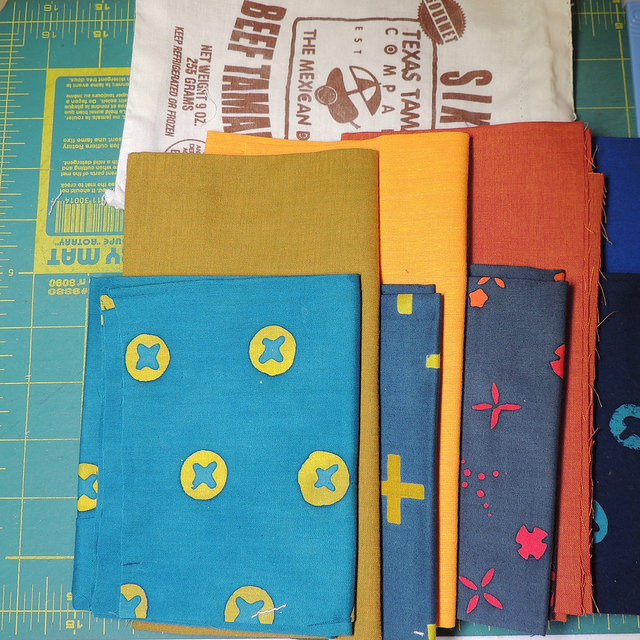 I chose the beef tamale sacks (printed in brown) for this row.
I decided to follow the example of my tulip row and use only 4 of the print fabrics–all different than those used for the adjacent tulips–and combine them with the shot cottons.
Like with the tulips, I arranged them in value order, with the darkest in the center.
Here’s how they look all together, laid out on the floor.
If you are thinking all three rows don’t look exactly the same width, you could be right. I’ve decided I will add or chop off when the time comes and not worry about it.
Thought for the Week

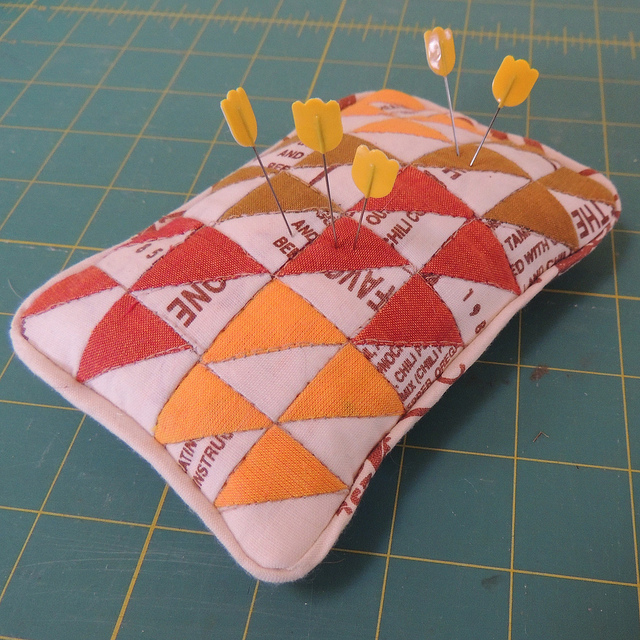
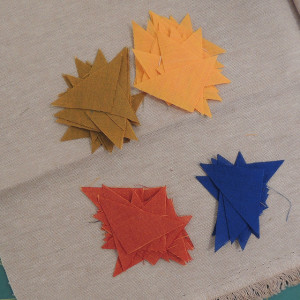
When I was finished making my blocks, this is what was left-over … tiny bonus triangles
If you have made the block you know that these small–sewn together, they would make a half square triangle unit with a finished size that is smaller than an inch. I confess that when I made the lotto blocks for this month, I deemed them TOO small to save and tossed them. But this time I started to wonder what they might become.
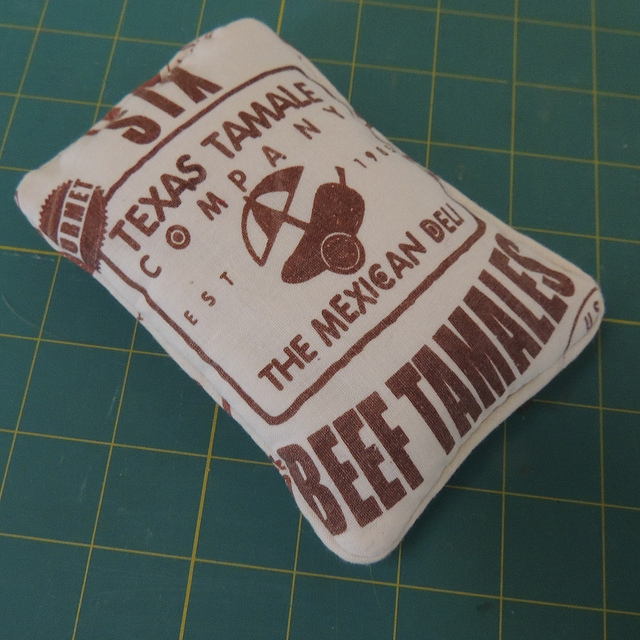
I started with the triangle pairs from the corners. I sewed them together and then sewed the into tiny Little Cedars blocks (made from 4 half-square-triangles. I decided they could become a pincushion. I used a piece from the front of a tamale sack for the back and cut bias from the rest of the sack for the piping. (I couldn’t resist using one of the drawstrings to fill the piping). It’s filled with cotton filling.
I thought it was a nice example of how using the little leftover bits from a quilt that you might not be keeping can become a souvenir of that quilt.
 |
 |
Next I asked myself one of those “what if?” questions and decided to use a the rest of the shot cotton triangles with a new fabric.
I cut some neutral-colored quilter’s linen into 2 inch squares and added the triangles to the corners. Then I sewed them into 4-patched and then into a 12-inch square. I am happy with the result, but I haven’t yet decided what it will become: mini-quilt, pillow cover or the beginnings of a linen tote. What do you think I ought to do with it? Here’s the before and after.
 |
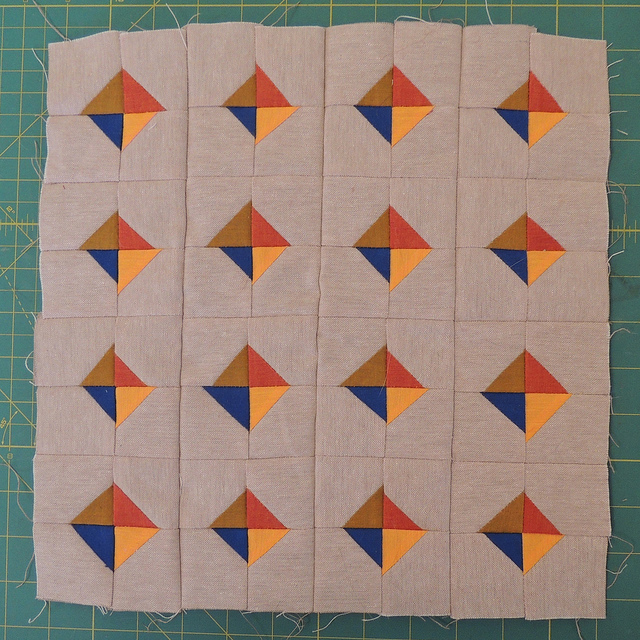 |
I liked how the small bits of iridescent fabric created a completely different feeling when combined with the linen fabric … and thought these triangles were definitely worth saving.
 I was left with the triangles that had both tamale sack and printed fabric.
I wondered what would happen if I sewed them in strip, so I tried it. The create a cool little zig zag. I added more of the tamale sack fabric which unfortunately overwhelmed them.
For the moment, I’m leaving them in this state because I know there will be more bits and pieces to be used from future rows.
Sophie, I really hope you are not too discouraged to continue. I just found the group and I am really liking it. I can see that it would be a lot of work for you. Your recent instructions were not the problem, in my case, with my error of colour. I read the directions and picked my fabric out at two separate times and was not paying attention to the colour rules enough to notice that colours were to be the same. Hope I have posted this message in the correct spot. Thank you for all you do for me and this group, Sophie. I really appreciate it and you. Hugs,
Carol M.
Week 2 of 12 + 12 = 1
Remember my plan?
| 12 rows | |
| + | |
| 12 weeks | |
| ________ | |
| 1 Sampler Quilt |
This is my week 2/Row 2 check-in.
Did you notice last week in my coloring page sketch of the quilt that I didn’t resolve the gaps created by the fact that I decided on a 63 inch width and that those long 18-inch wide blocks didn’t fit in a nice multiple? For my second row, I chose to make the Many Triangles strips and share how I dealt with it … and also how I was able to simplify the block because I knew how it would be used in the row.
Adapting Blocks
For a 63-inch row, you would need 3 1/2 blocks that are 18-inches wide. Depending on the block pattern, a half-block may (or may not make sense). In this case, it is pretty easy to think about making half the Many Triangles, with two large triangles cut from one fabric and 1 large triangle plus two small triangles from the other.
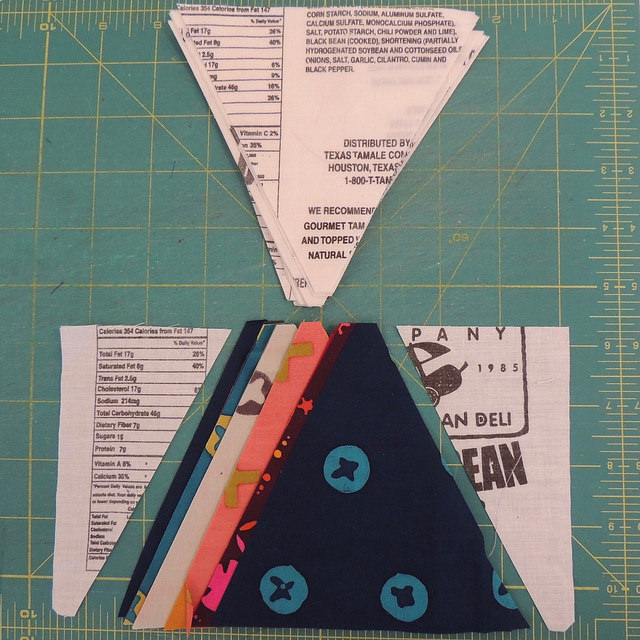 Because I knew these blocks were going to be sewn end to end, it made sense to me to eliminate all the small triangles except those on each end of the row. For a 63-inch row, you need 14 large triangles of one fabric and 13 of the background/second fabric along with the two small triangles on the ends.
I used the Tri-Recs tools to cut my triangles (starting with 5-inch strips for a 4 1/2-inch finished height). I used the same method for lining things up when I sewed this long strip together that I described in this post.
Fabric Notes
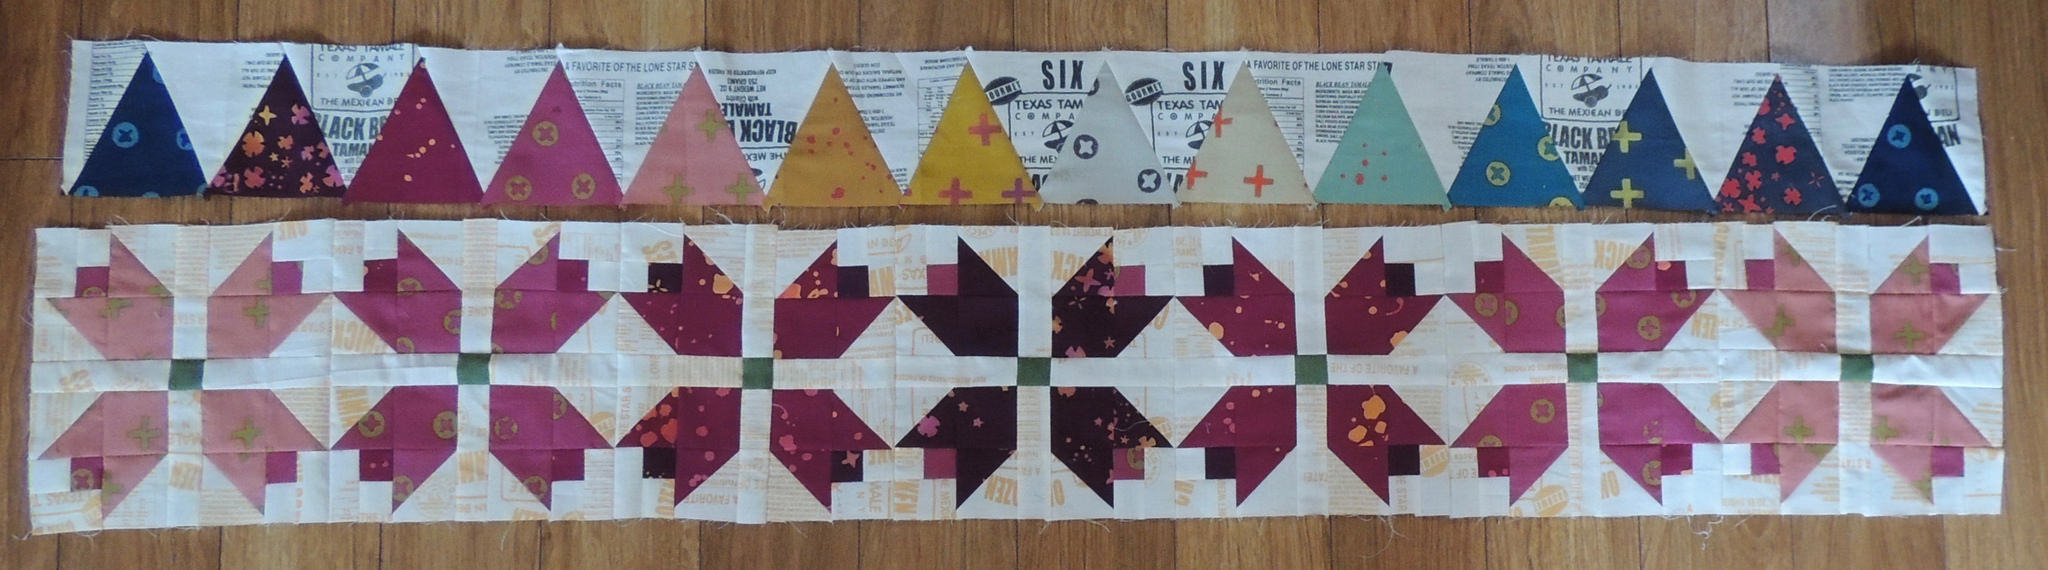
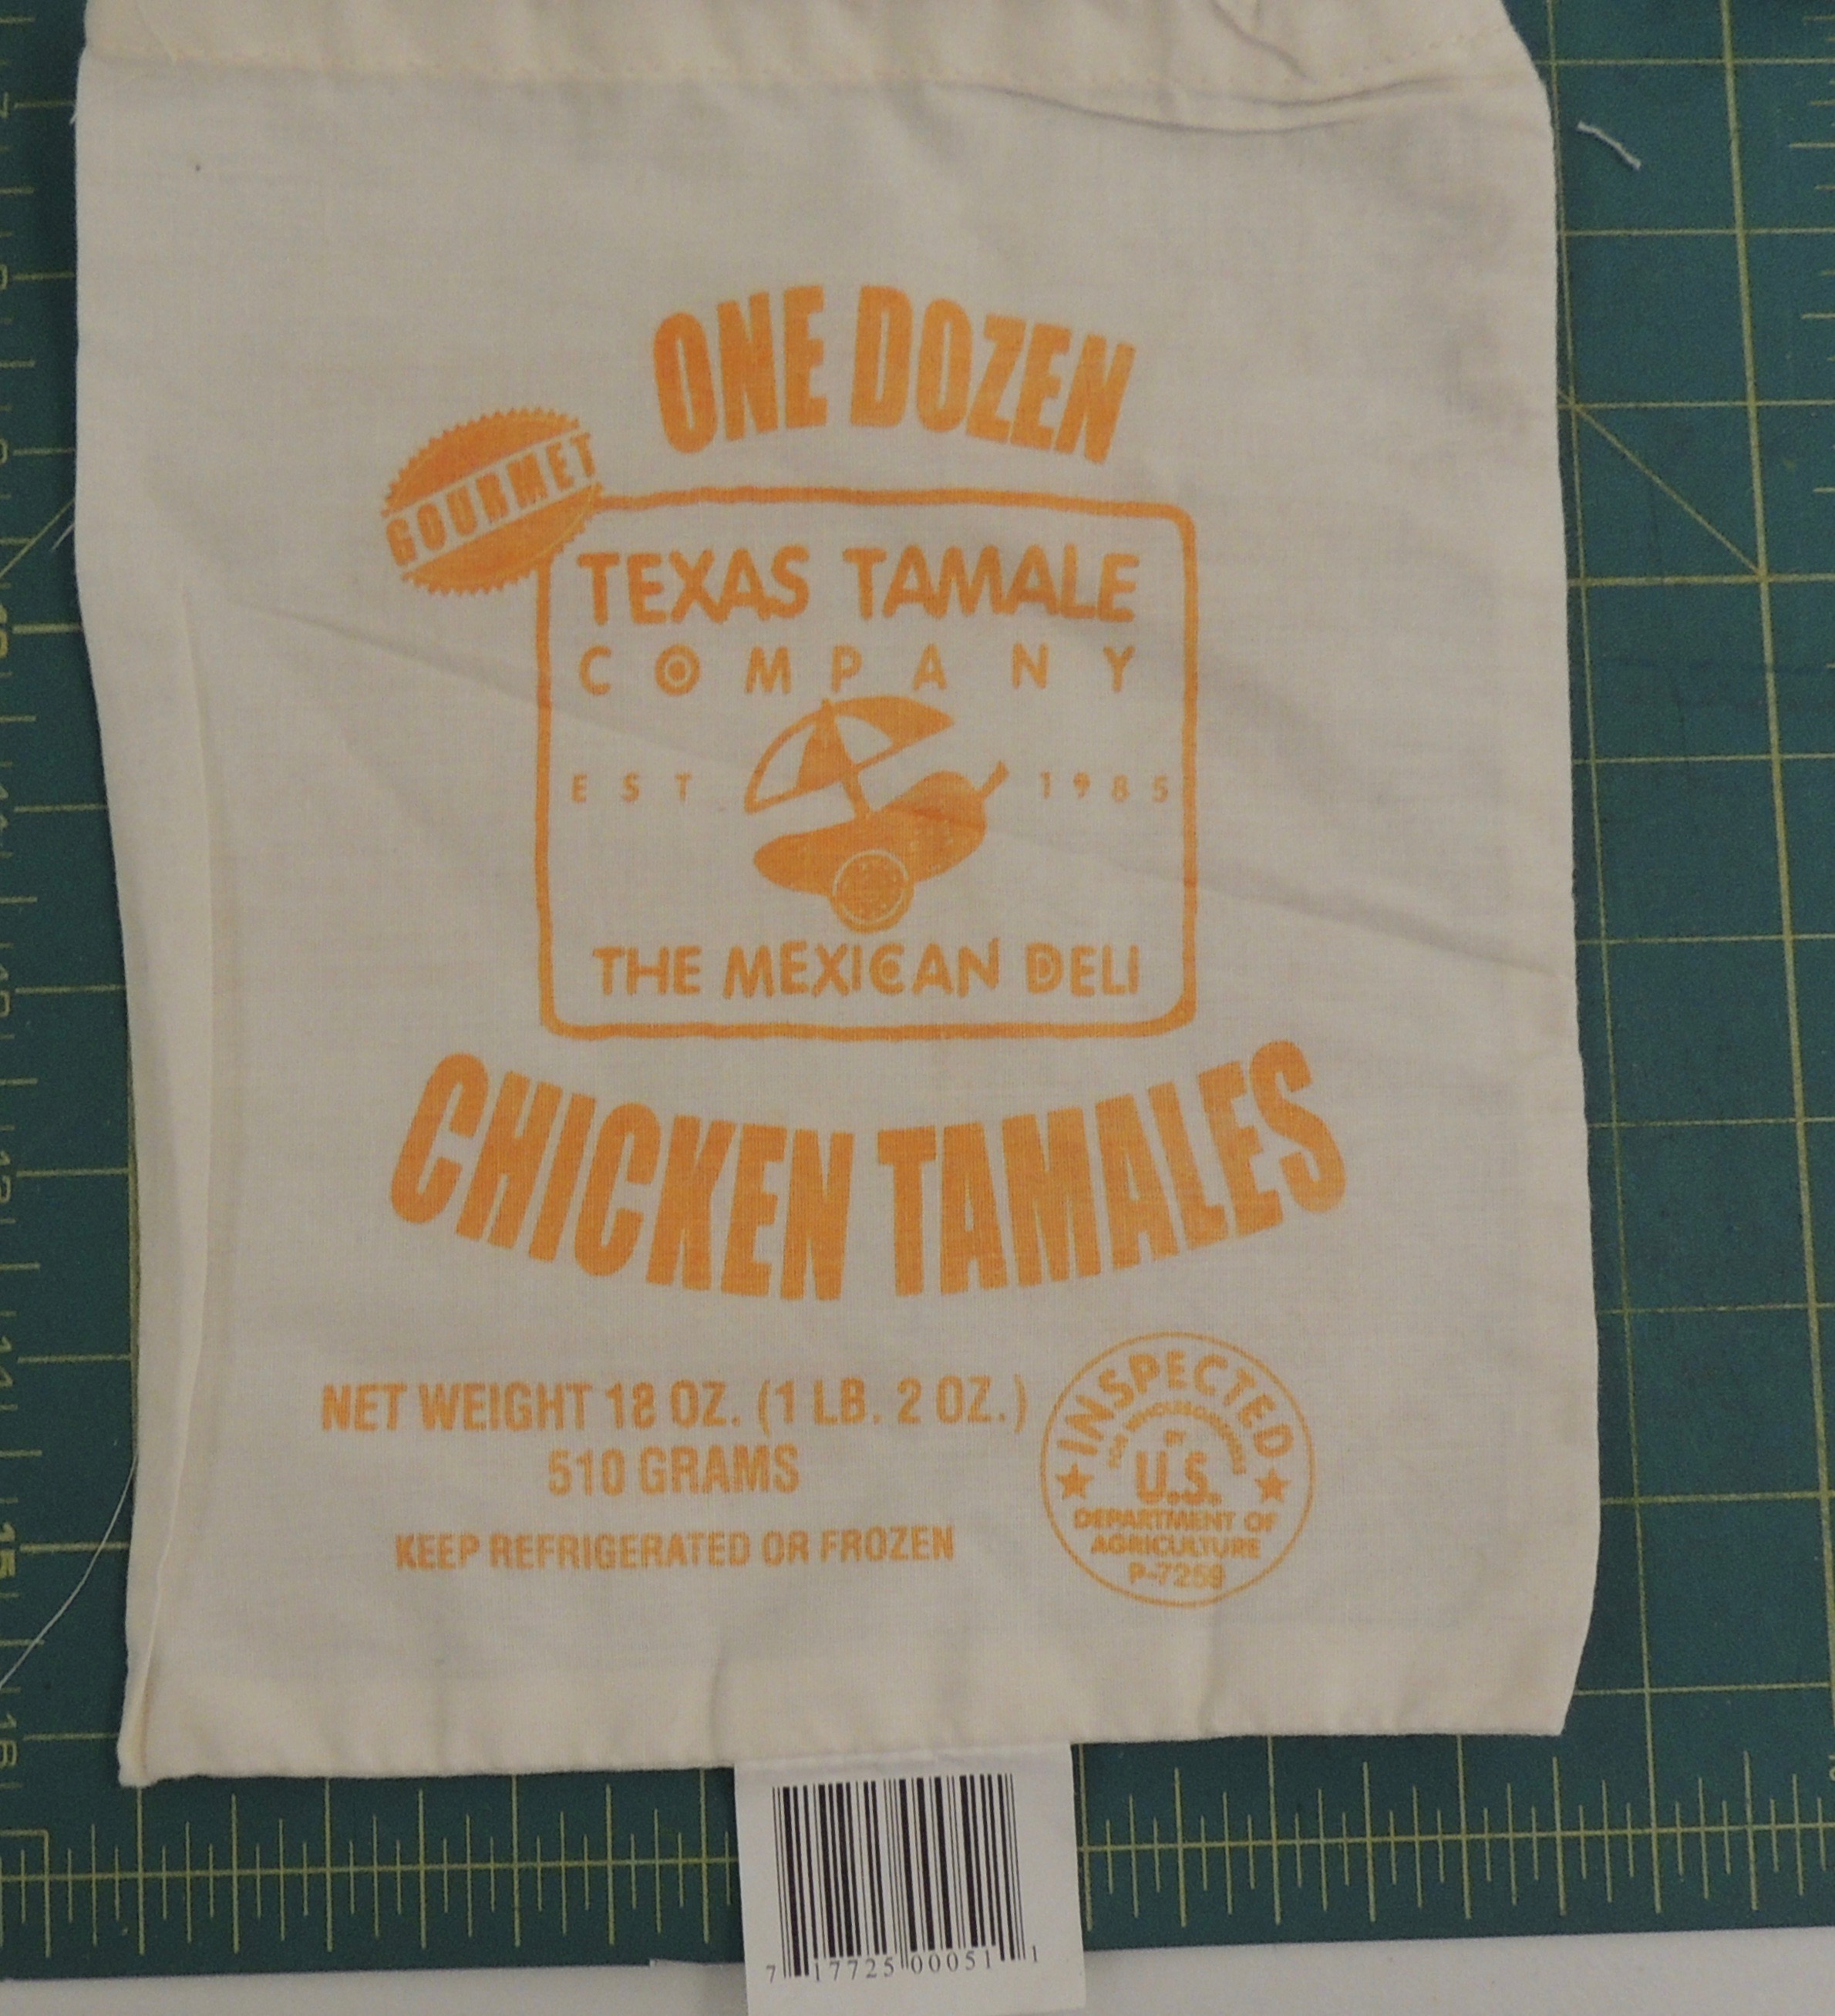
You may have noticed that the print color on the tamale sacks is different. For my quilt, in each row, I plan to use one flavor/color of tamale sacks as background. These are the black bean variety, printed with black. The print is slightly smaller because this is the smaller (6 tamale) size.
Because I had 13 different Handcrafted fabrics, I thought it would be fun to use them all in this row (with one repeated). Here’s how it came out (next to the Tulip row).
I haven’t decided yet if those matching SIX triangles near the center bug me enough to change them … I am reserving judgement for a while. In the meantime …
Thought for the Week
 If I was working on a technology project, it would be broken into milestones with deadlines. We don’t always think of breaking up something we do for fun into measurable chunks and celebrating as we pass each milestone. Why not? I tend to avoid scheduling and setting goals for quilt making–because it IS fun and not work–but why not celebrate the milestones whenever they happen?
I decided to celebrate my second row finish late Friday night with a glass of wine and the luxury of time spent to appreciate my effort … even those two darn “gourmet SIX” twin triangles that managed to appear in this candid photo.
12 + 12 = 1 Sampler Quilt
I was looking at a calendar recently and noticed that there are (almost) 12 weeks until Christmas. I wondered if I could make a sampler quilt, organized in 12 rows (of our 12 monthly blocks) in those twelve weeks. It seemed doable to me. I started thinking:
| 12 rows | |
| + | |
| 12 weeks | |
| ________ | |
| 1 Sampler Quilt |
I decided that I would post weekly and share some of my thought process as I worked through my sampler quilt. If you have been making extra blocks and thinking about a sampler, I hope you will share your progress. If you create a post here, please use the category block lotto community and the tag my sampler for your posts … until it’s ready for show and tell in the gallery.
Even if you haven’t been making extra blocks, now that you’ve seen most of the blocks for the year, you might think about if like them enough to make a sampler of your own. You might want to adopt the 12 + 12 = 1 attitude and join me.
Whether you are making a sampler quilt or not, everyone is, of course, encouraged to read along, offer their comments and hold me accountable as I work through my rows.
Choosing a Theme or a Feeling for my quilt
Each year, when I start thinking about lotto block choices, I ask myself what haven’t we done that could be interesting? This year, I started with the notion of making blocks that could have a Folk Art feeling. I will admit that I probably strayed a little too far from that original idea in my block choices for this year, but it was still with me when I couldn’t resist a fat quarter bundle of Alison Glass Handcrafted offered by Massdrop to use in a sampler quilt of this year’s blocks. I thought the simple, primitive motifs and the complex colors conveyed the folk art feeling I had in mind.
When I attended the AQS show in Albuquerque in January, on impulse I picked up some shot cottons in colors that I thought would work with my fabrics.
 Fast forward a few months until, a couple months ago, when I was moving across town, I came across a bunch of these small draw-string sacks, that had been acquired for a recycling challenge with guidelines that I probably initially misunderstood. The sacks didn’t fit the guidelines and they were packed away. When I pulled them out of a drawer in the studio to pack for the move, I wondered if they could become the background for my folk-art-feeling quilt.
I found these in the supermarket when I lived in Texas–they are cotton drawstring bags which held frozen tamales. They came in two sizes and were printed in 5 colors (one for each of the flavors). They look like cotton muslin; they went through the washer and dryer OK, but I doubt they are 100% cotton (and may not be cotton at all.) They are really well-sewn. After carefully unpicking the stitching on about a dozen of them, I decided it wasn’t worth the effort to do so, because the thick thread (and likely large needle) used to sew them left large holes that I feared would always be there.
Quilt Design
Last April, I shared some album quilt design ideas and mentioned that I planned to make a row quilt.
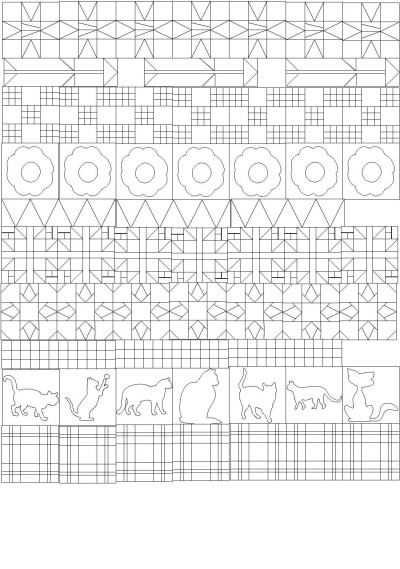 Here is a sketch of my planned layout. There will be two more rows (November and December blocks) at the bottom. I removed all the color and created a Printable Coloring Page to create a blank slate for anyone who would like to play with the idea. The blocks, from top to bottom are:
- Made Fabric Star
- Arrow
- Double 9-patch
- Appliqué Flower
- Many Triangles
- Tulip
- Twinkle Star
- Bargello 9-Patch
- Quilter’s Choice (Pets–you can tell what I’m planning)
- Plaid 9-Patch
If you make a row quilt from our blocks (one block per row) with nothing in between the rows, it will be 90 inches tall, which puts it in bed quilt-sized territory. What size bed is determined by how many blocks you decide to make for each row. I will be making 7 (of the 9-inch square blocks) which will make my quilt 63 x 90 before any borders are added.
Getting Started
 After making a half-dozen tulip blocks for the Block Lotto and 25 more for my scrappy tulip quilt, that block pattern still felt fresh in my muscle memory so I started there.
Because the block is made from a lot of relatively small pieces, I thought it was a good one to see what was going to happen with the relatively large-scale design of the Allison Glass fabrics. It was also a test of what those tamale sacks would do when cut and used as fabric.
My initial reaction was that I loved it. And so, I made 6 more blocks and sewed together my first row.
If you look at the quilt sketch, you’ll notice that I didn’t start at the top–which would have been, perhaps more logical. I could end up creating the rows and deciding on the order later … or I might just start in the middle and work my way up and down adding rows to the top and bottom of the tulip row in the middle of the quilt.

Thought for the Week
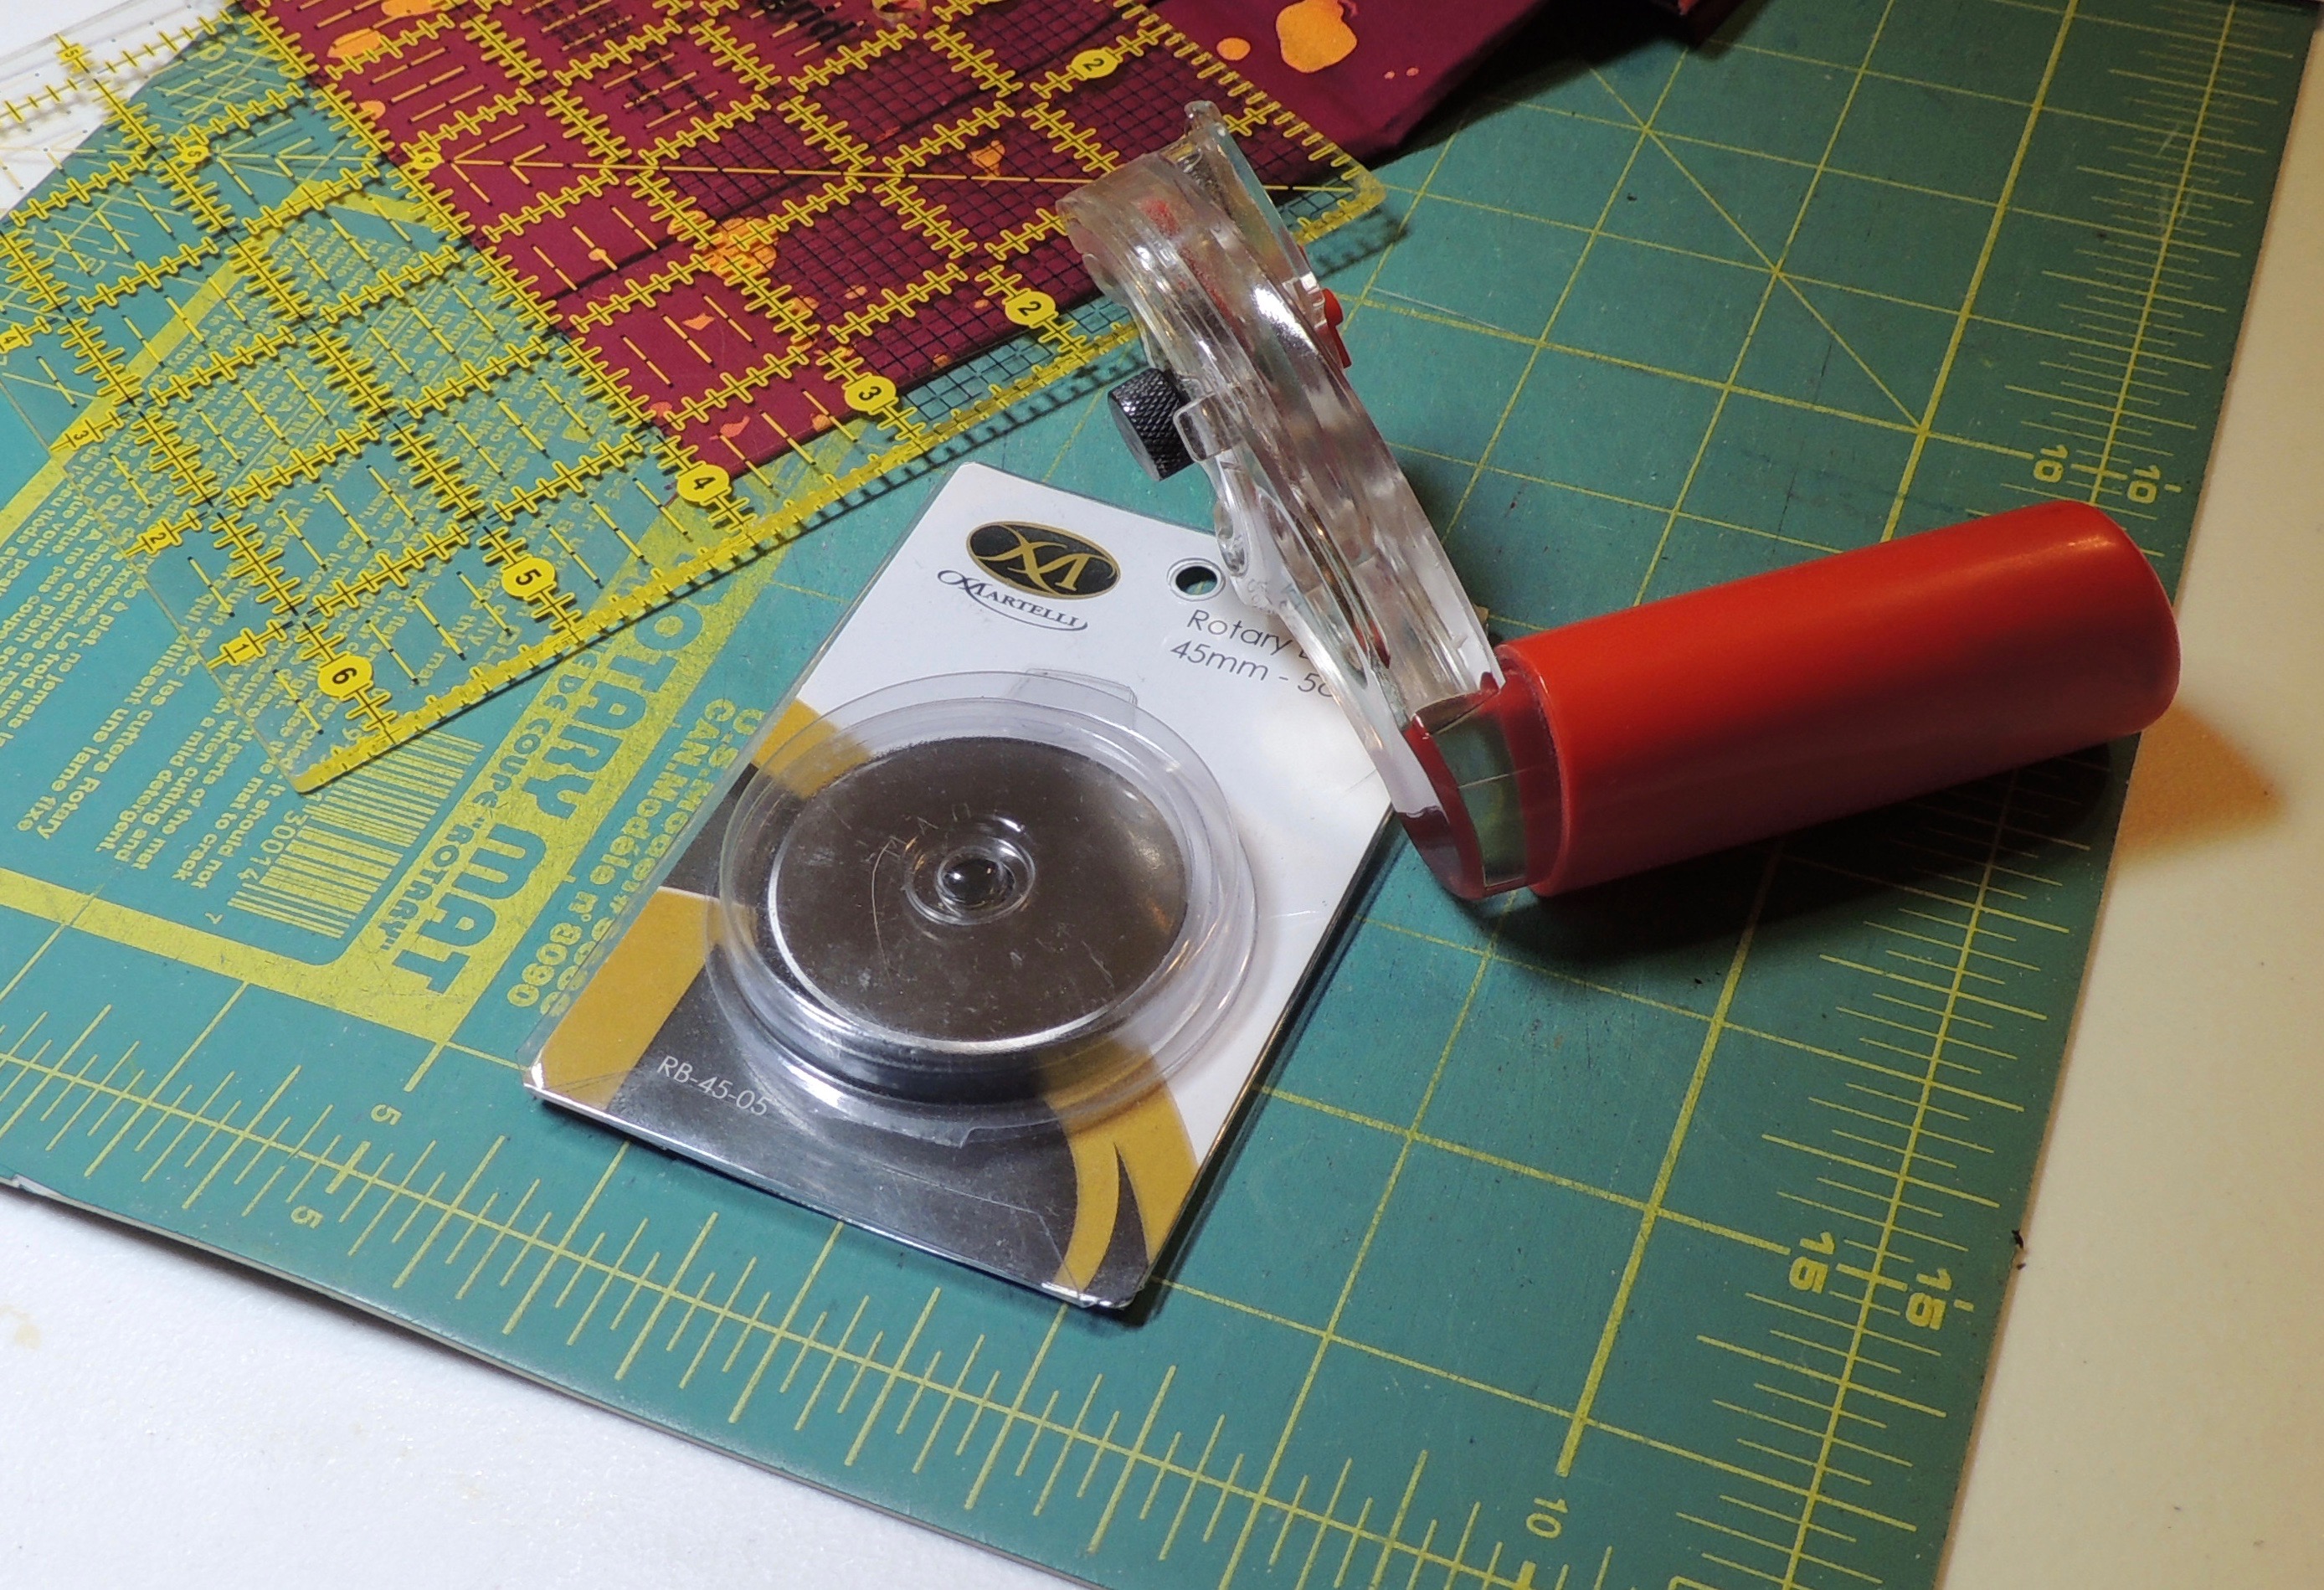 Starting a new project? Why not start with a new blade?
I tend to use my rotary cutter until it feels like it just won’t go on … but before I started this project, I changed the blade. It felt like a treat. If you haven’t changed yours in a while, why not treat yourself?